Get up to 60% off Yarn Shop Yarn Deals

Welcome to our store Learn more about Mary Maxim

New items added! View Our Newest Items

Get $10 off any order of $79

Now thru 1/7/25.

556B10

How to Crochet a Bow: Complete Guide
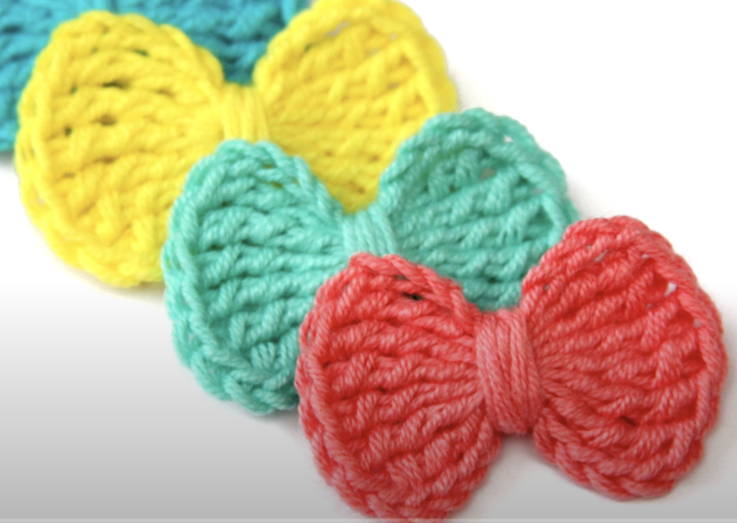
Embarking on the journey of crocheting a bow opens up a world of creative possibilities, each stitch weaving together a timeless adornment. The intricacies of how to crochet a bow are not just about the final product but also the meditative rhythm of the craft itself. From selecting the perfect yarn to mastering the art of shaping, this guide will unravel the secrets to creating a bow that exudes elegance and charm. Stay tuned to discover the meticulous steps and expert tips to elevate your crochet game.

Materials Needed

Gathering the essential materials is crucial to ensure a successful crafting experience when preparing to crochet a bow. You will need yarn in your desired color, a crochet hook appropriate for the yarn weight, scissors for cutting the yarn, and a needle for weaving in the ends.


Abbreviations

Understanding the abbreviations commonly used in crochet patterns is fundamental for effectively following instructions and achieving desired outcomes in crocheting projects. Abbreviations are shorthand notations for specific crochet stitches and techniques. Some standard abbreviations include 'ch' for chain, 'sc' for single crochet, 'dc' for double crochet, and 'st' for stitch.


How to Crochet a Bow: Pattern Instructions

When creating a crocheted bow, it is essential to follow a structured pattern to achieve the desired result. The pattern instructions typically consist of several vital steps that guide you through the process. 


Step 1: Foundation Chain

To craft a beautiful crochet bow, establish the foundation chain by carefully creating a series of interconnected loops with your chosen yarn. The foundation chain sets the stage for the entire project, determining your bow's width and overall structure. Start by making a slip knot at the end of your yarn, and then create a series of chain stitches by looping the yarn over your crochet hook and pulling it through the loop on the hook. The number of chains you make will depend on the bow size you want to create.


Step 2: First Row

Work a specific number of single crochet stitches into the foundation chain you created in the previous step for the initial row of your crochet bow pattern. To start, insert your hook into the second chain from the hook, yarn over, and pull up a loop. Yarn over again and pull through both loops on the hook to complete a single crochet stitch. 


Step 3: Second Row

Attention to detail and precise stitch placement will be crucial for achieving a polished and professional finish in crocheting a bow. As you begin the second row, continue to work in the established pattern. To maintain consistency, start each row with the appropriate chains and stitches.

Step 4: Third Row
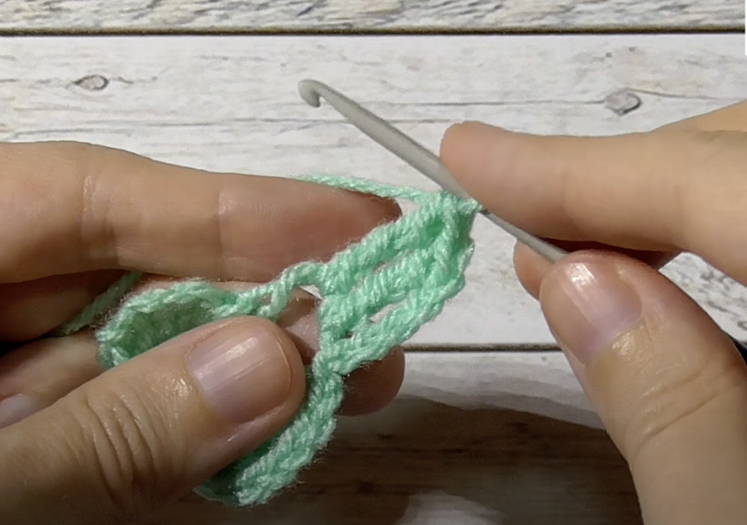
With precision and skill, begin the third row of crocheting the bow to shape further and define its elegant design. For the third row, chain one and turn the work. Single crochet in the first stitch, then make two single crochet stitches in the next stitch. Repeat this pattern across the row: one single crochet in the next stitch, two single crochets in the following stitch. 

Step 5: Fourth Row
The fourth row refines the shape and structure of the crocheted bow and introduces further intricacies to enhance the design's elegance. You will work additional stitches in this row to increase the bow's width. Begin by chaining one and turning in your work. Then, single crochet across the row, maintaining the stitch count from the previous rows.

Step 6: Fifth Row
To achieve a neatly defined edge on your crocheted bow, follow the pattern instructions carefully to the fifth row. In the fifth row, you will continue to work in single crochet stitches, maintaining the established pattern. Pay attention to any increases or decreases required to shape the bow correctly. At this stage, the bow should start taking its final shape. Count your stitches periodically to ensure you are on track with the pattern. 

Step 7: Sixth Row
To complete the crocheted bow project, proceed to the sixth row by meticulously adhering to the pattern instructions provided. This ensures precision in each stitch to maintain the bow's desired shape and structure. In this row, you will continue to follow the established pattern, working with the designated number of stitches and carefully executing each step.

Step 8: Seventh Row
Moving forward with the crocheted bow project, the meticulous execution of the seventh row is crucial in maintaining the bow's structural integrity and desired aesthetic. As you progress through this step, keep the following key points in mind:

- Ensure each stitch is placed accurately to maintain consistency.
- Pay attention to the tension of your yarn to prevent the bow from becoming too loose or tight.
- Double-check your stitch count to avoid any errors that could affect the final look of the bow.
- Take your time to create neat and even stitches, enhancing the overall appearance of the finished bow.

Step 9: Eight Row
Attention to detail and precision are paramount to crafting the eighth row of the crocheted bow, achieving a polished and professional finish. Following the established pattern, you will continue to work in double crochet stitches at this stage. Begin by chaining two to turn your work, then proceed with double crocheting in each stitch across.
 
Step 10: Ninth Row
To continue the intricate pattern of crocheting a bow with precision and finesse, proceed to the ninth row following the established instructions for a seamless and polished final product. In the ninth row of crocheting the bow, pay close attention to the following key points:

- Work single crochet stitches across the row.
- Maintain the exact stitch count as the previous rows for consistency.
- Check your tension to ensure the bow maintains its shape.
- End the row with a slip stitch to prepare for the next step.

Step 11: Assembly
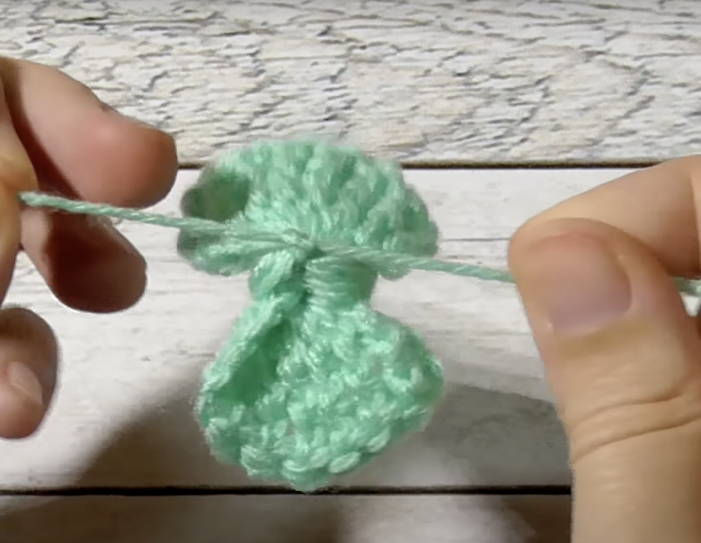
Upon completing the meticulous ninth row of crocheting the bow with precision and attention to detail, the next crucial step is to seamlessly assemble the various components following the detailed pattern instructions provided. Begin by folding the crocheted piece in half, ensuring the edges align neatly. Using a yarn needle and the tail left from fastening off, securely stitch along the folded edge to create the center crease of the bow. Then, wrap another piece of yarn around the center of the bow several times to form the distinctive bow shape, securing it tightly at the back.

Step 12 (Optional): Finishes
For a polished and refined look, consider incorporating subtle embellishments to enhance the aesthetic appeal of the crocheted bow. You can also attach a decorative button, beads, or sequins.

Conclusion
Reflecting Mary Maxim's enduring legacy and commitment to exceptional craftsmanship, their dedication to quality and service remains unwavering. Throughout its history, spanning over 50 years, Mary Maxim has established itself as a reputable mail-order company, reaching over 3 million customer homes across Canada.